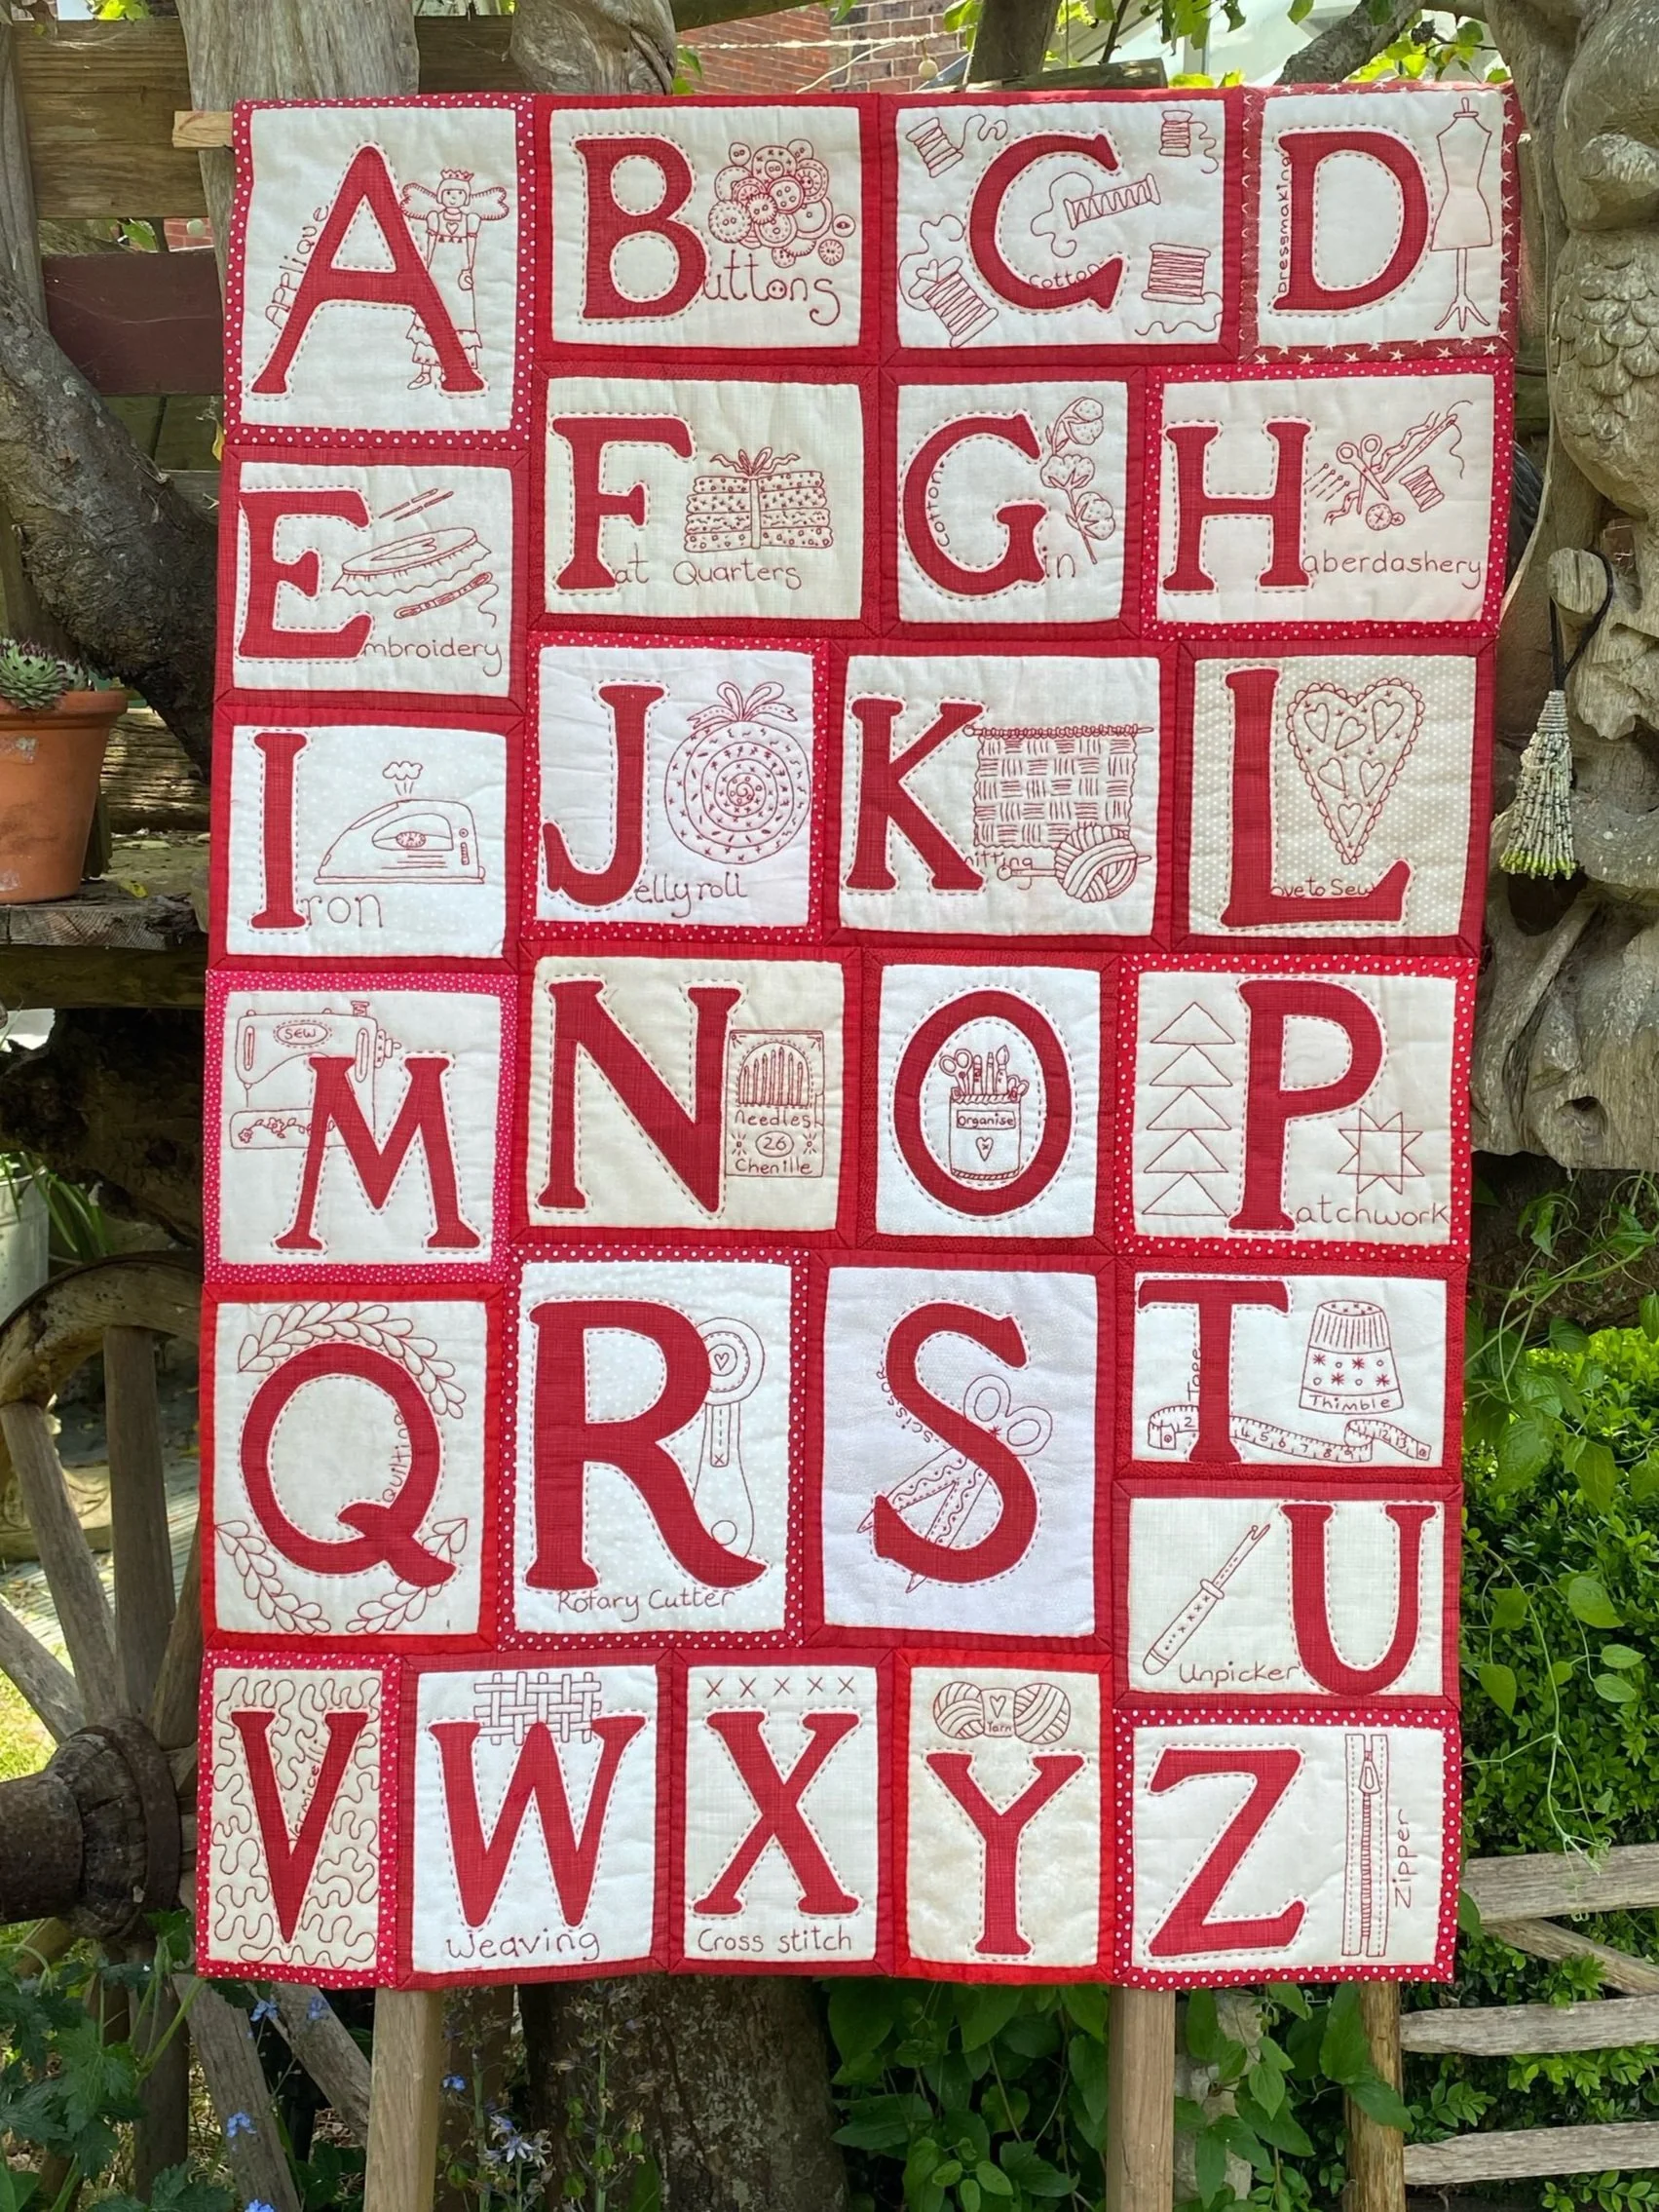
Putting your Quilt together
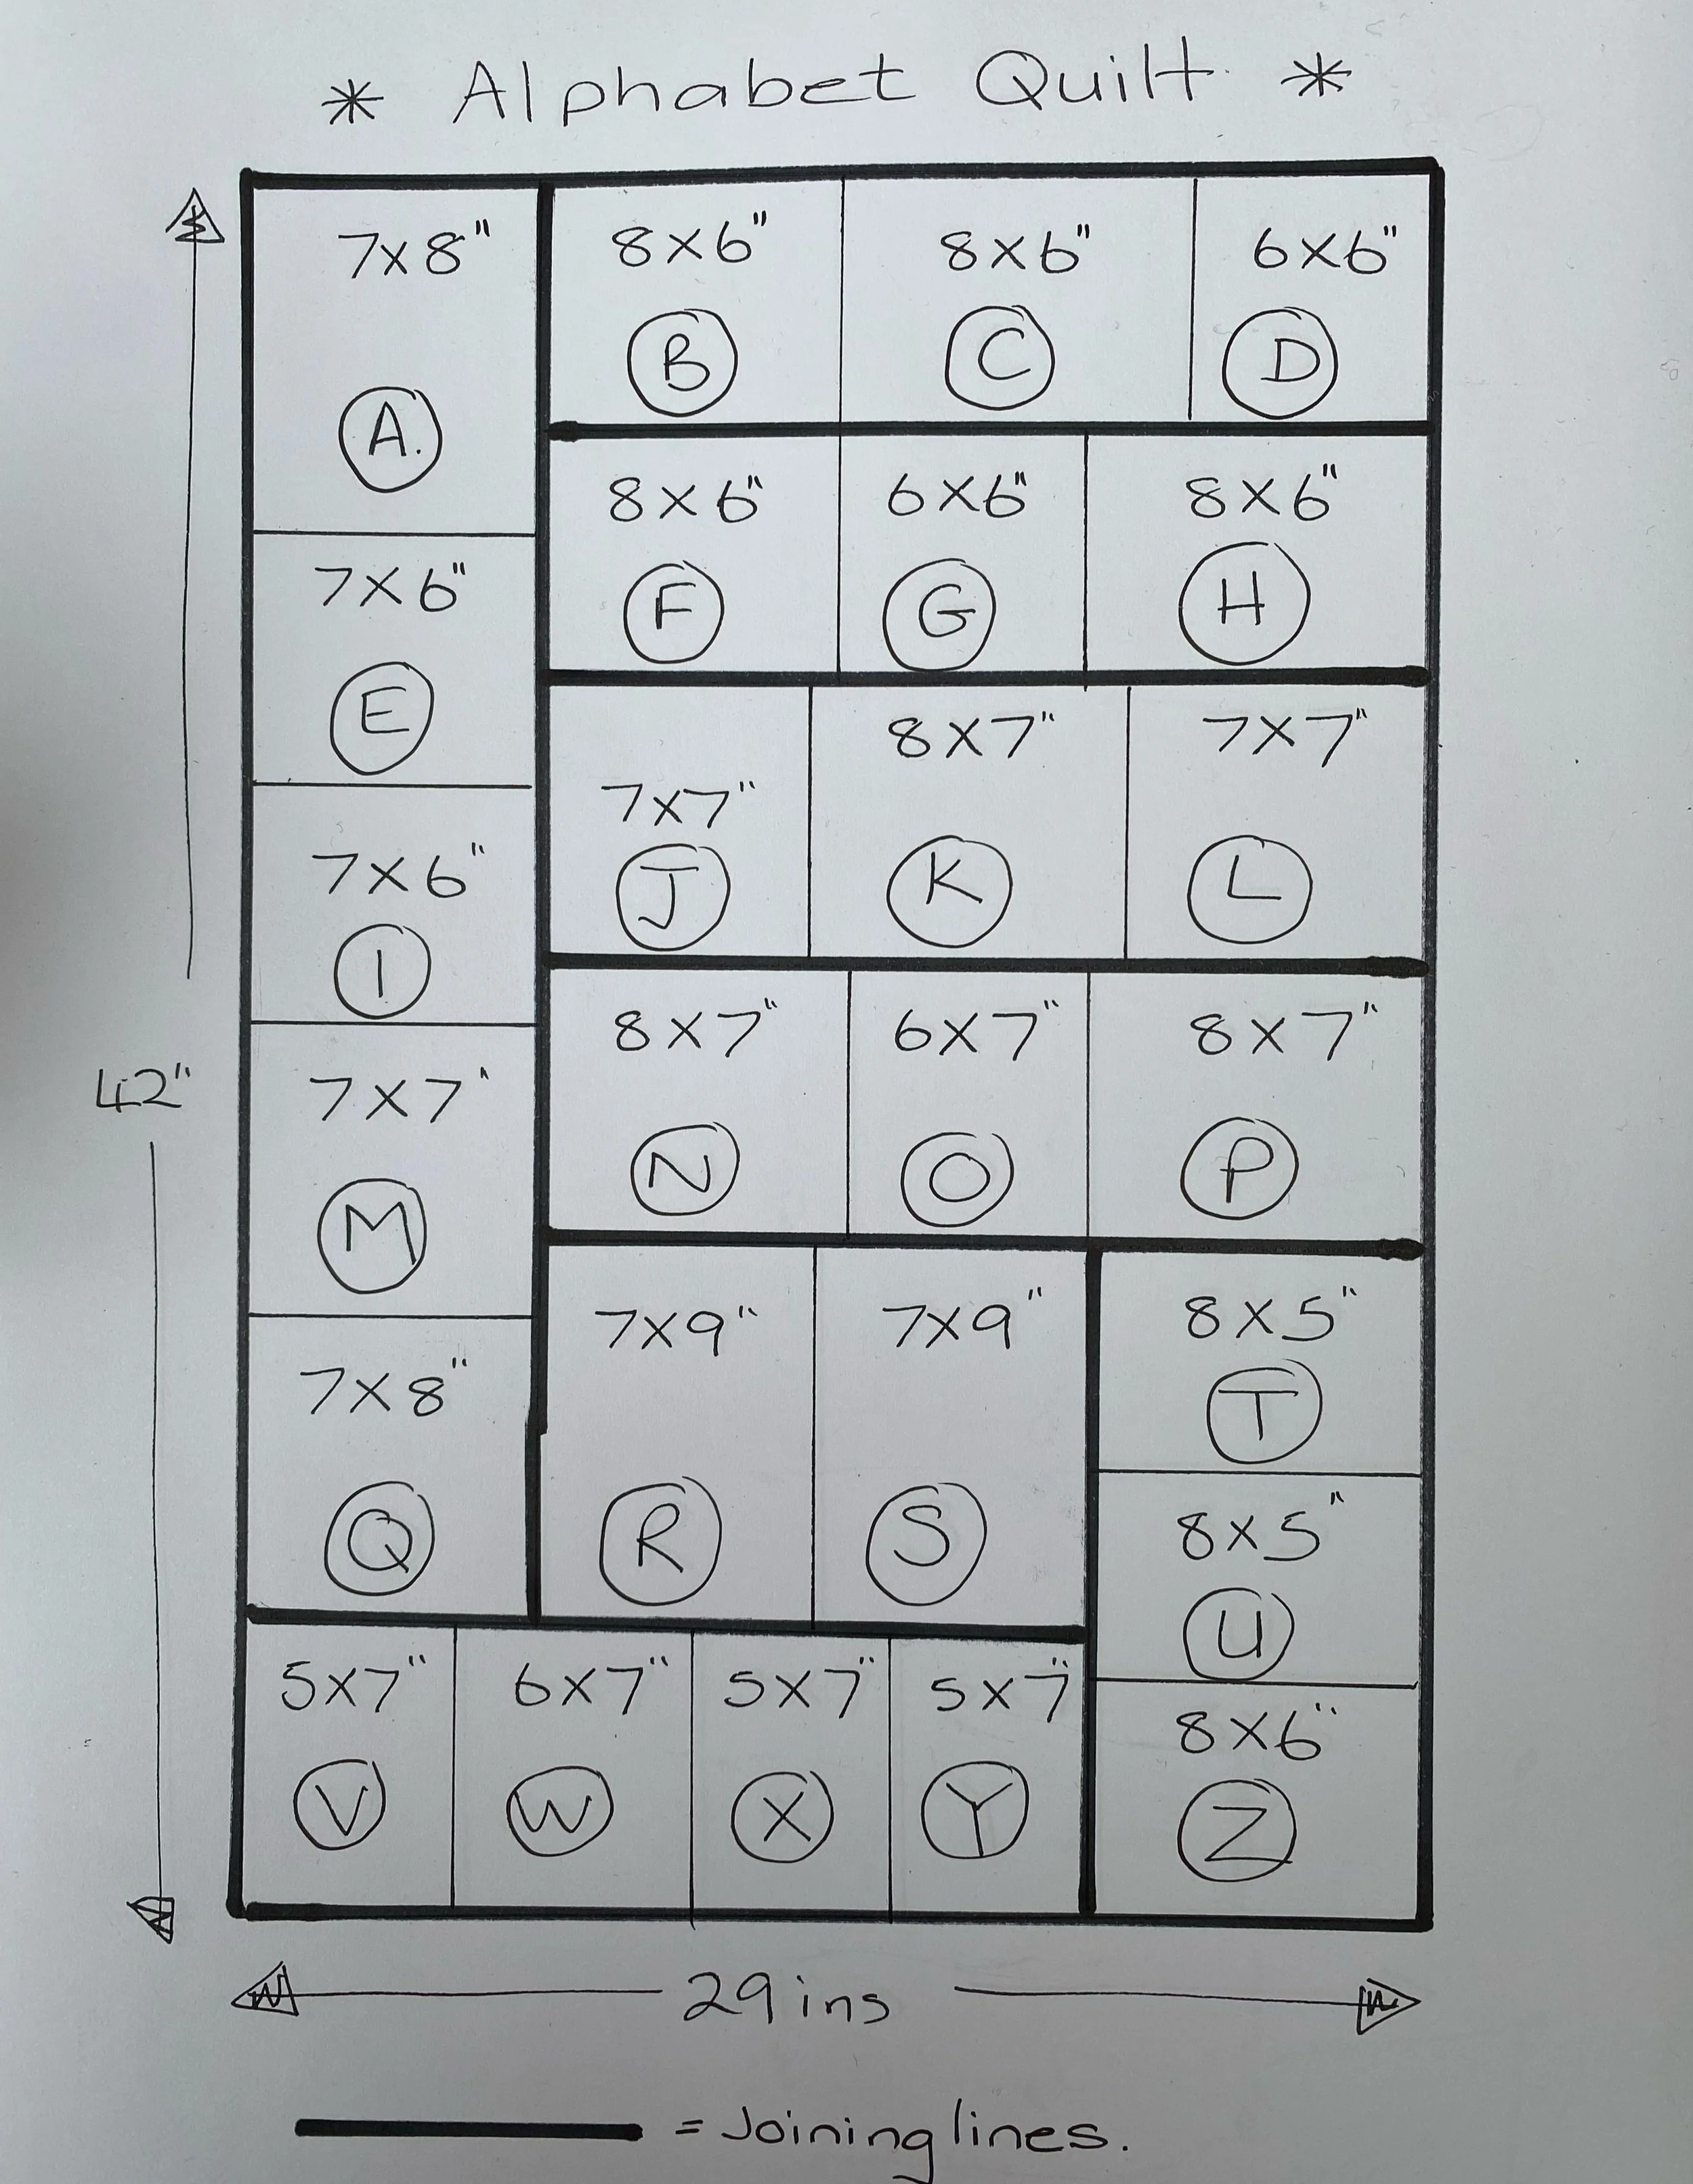
This will be easy as you have already started to sew some of the blocks together, just one insertion seam at the end and its all done!
Just before you start sewing them all together, check they fit as I must confess on having to adjust one of my measurements when I cut too skimpy and thought I could get away with it – I couldn’t! To remind you the stitch for sewing them together is a glove stitch and the video for this will be on your home page . I also cut a strip 2½ in wide to make a sleeve for the top of the quilt so it hangs nice and flat. I turned a ¼ seam allowance at the top and bottom, pressed them and slip stitched to the top edge. The label in a must and final flourish for the quilt, you could just draw over it with a micron pigma pen or stitch it and attach to the back. We made this quilt in a difficult year and I am sure historians of the future would love to know what we got up to.
By the way, we are leaving the home page for this year’s quilt live for you so you can refer to it at a later date if you have not yet finished your quilt.
Download a copy of these tips and the quilt plan here


